Minutas Teams is an application that allows you to document your meetings by taking advantage of the information that you already have available in Microsoft Teams.
The application fully integrates with Teams and allows you to use your Office 365 user account, use the visual themes and the teams you already belong to.
App Features
Minutas Teams includes several functionalities that allow you to do the following:
Create, manage, and share your meeting minutes.
Create and manage meeting invitations.
View your subscription details.
Integration with Microsoft 365 y Microsoft Teams
The Minutas Teams app can be used exclusively in the context of a Microsoft 365 business subscription directly within Microsoft Teams. Currently, Minutas Teams cannot be used as a standalone application from the internet or in some other third-party application platform.
Minutas Teams uses existing Microsoft Teams users and teams to make it easier to capture and organize information.
Subscriptions
To use Minutas Teams, it is necessary to have a subscription to the online service that supports the application's operation. The service is offered in the form of annual subscription plans. There are different plans that provide the same functionality to users, the only difference being the amount of minutes that can be created in each different plan. Trial subscriptions are available for organizations that need to test the service before formally hiring it.
Minutas Teams can be installed in Microsoft Teams for personal use or for everyone on a team.
If you use Minutas Teams personally, you will be the only person who will have access to see the created minutes and only you will be able to modify them directly.
If you add Minutas Teams to a team, all the minutes will be available to all team members and guests. You can install Minutas Teams without any restrictions on all Microsoft Teams teams where you need it.
Install Minutas Teams for Personal Use
From the Teams main menu, select "Applications" to open the Microsoft Teams application store. You can search by name or directly in the Productivity applications. Select Minutas Teams and on the application detail screen, click the "Add" button. Click on the image below to see how to do it.
From the Teams main menu, select "Applications" to open the Microsoft Teams application store. You can search by name or directly in the Productivity applications. Select Minutas Teams and on the application detail screen, click on the "Add to a team" button that is displayed when the "Add" button is displayed. Select the computer to which you want to add the application and then click on the "Configure a tab" button. Finally click on the "Save" button.
To access all the features of Minutas Teams, it is necessary for an administrator user of the Microsoft 365 subscription to authorize the corresponding permissions.
Search for users in the organization's directory.
Create events in users' Microsoft Outlook calendars.
Create and update tasks in Microsoft Planner.
If the permissions are not authorized, the experience will be restricted as Minutas Teams will not be able to access the information that relies on data obtained from the Microsoft 365 subscription.
To grant the permissions, follow these steps:
In any restricted section of the application, click on the 'Fix app permissions' button.
You will be redirected to an information screen. Select the 'Authorize permissions' button.
The browser will open and prompt you to log in with the credentials of the Microsoft 365 subscription administrator.
Accept the permission request.
Once the permissions are authorized and the application reloads, you will be able to use all the previously restricted functionalities.
In the Teams main menu, click the "More Added Applications" button to display the list of applications you have installed. Right click on the Minutas Teams icon and select "Uninstall". You will be shown a message to confirm that you want to remove the application.
On the team where you want to delete Minutas Teams, display the app menu, and select the "Remove" option. On the screen that will appear, click on the "Delete" button.
The application consists of several modules in which different information can be viewed and managed. The main ones are: Main screen, Minute details, Meeting Invitation details and Statistics.
Main Screen
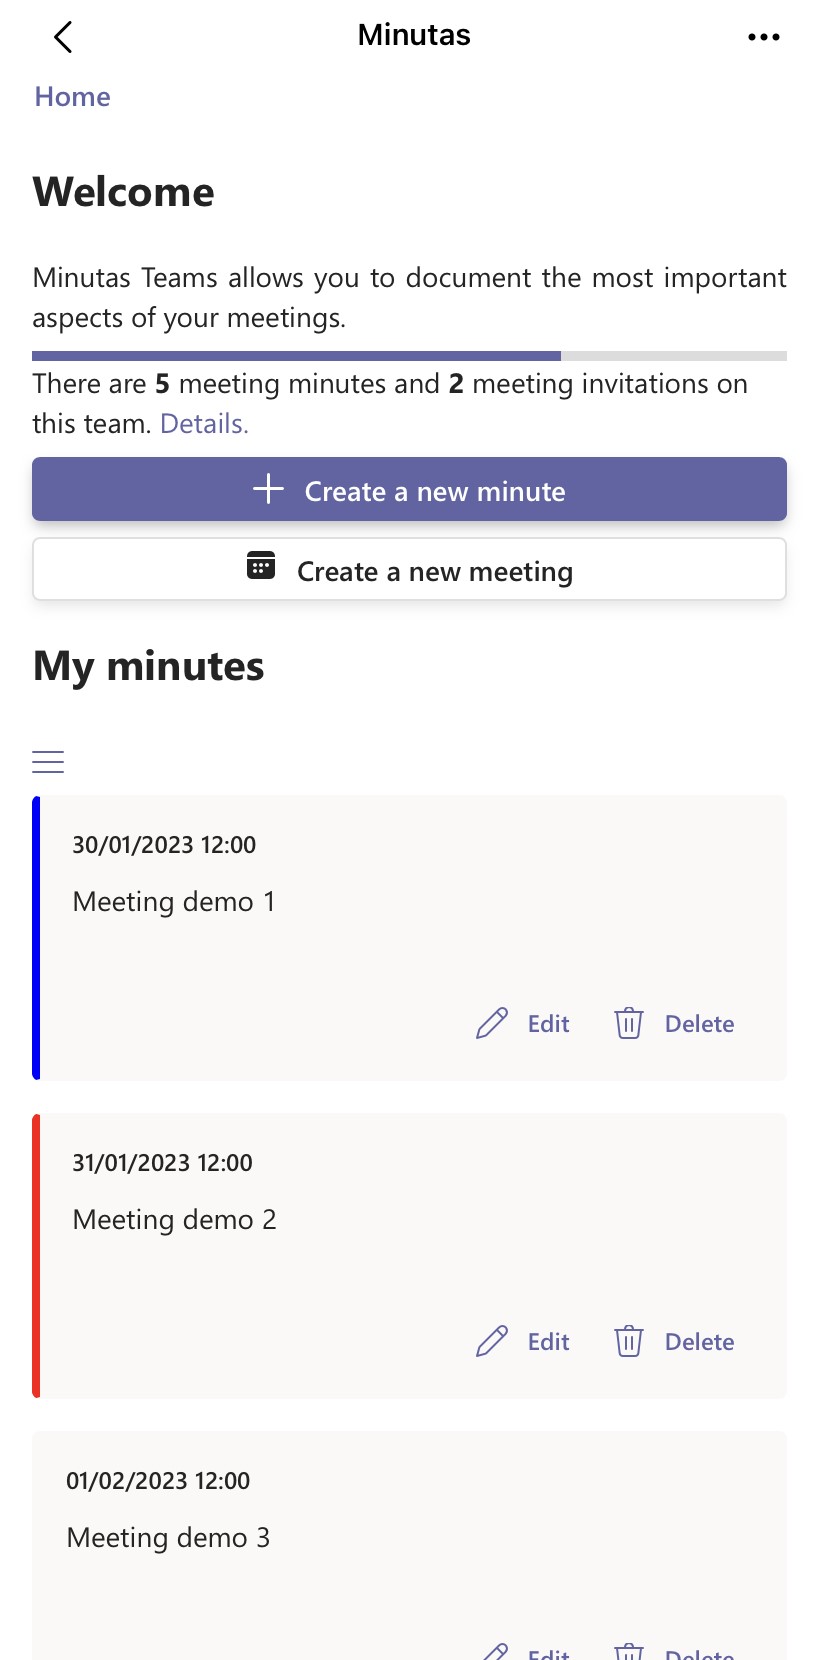
The Minutas Teams home screen has the following components:
Welcome message.
Consumption indicator: It shows you the number of minutes you have created in the current group or team. Hover your cursor over the word "Details" to see a summary of your subscription's updated minute usage.
Main actions: "Create a new minute" and "Create a new meeting".
Main work area: Space where the created minutes will be displayed.
Additional actions: The "Search" button allows you to search for minutes. The "Statistics" button shows you progress on the tasks created in the minutes.
Main navigation: Indicates which section of the application you are currently in and allows you to return to the application's home screen.
In Minutas Teams you can capture 2 types of content: Minutes and Meeting Invitations. A minute is created during or after the meeting in order to document it. A meeting invitation is created for a meeting that has not yet happened. It will allow you to summon people and introduce the subject to be discussed in the meeting to them.
Minute Details
While you are on the main screen of the application, you can view a list of minutes created in the application. If you click on the "Modify" button of any minute or if you click on the "Create new minute" button to create a new minute, a screen will be shown where you can manage the relevant data of your meeting. This screen has the following sections:
General information: General information of the minute.
Common Actions: Actions applicable to the minute that allow you to export it or share it by email.
Main workspace: It shows you in the form of tabs sections where you can capture the objectives of the meeting, the agenda, the people who attended, the agreements reached, meeting notes, tasks assigned to the attendees and pending issues.
While you are on the main screen of the application, you can view a list of created minutes and meeting invitations. If you click on the "View meeting" button of any element of the list or if you click on the "Create a new meeting" button, a screen will be shown where you can manage the relevant data of your invitation. This screen has the following sections:
General information: Details about the meeting invitation.
Common actions: In this section there are actions applicable to the meeting invitation that allow you to schedule the meeting or delete it.
Main work area: It shows you in the work area sections where you can capture the objectives of the meeting invitation, the agenda, the attendees, and a personalized message that will be included in the email sent to the people summoned.
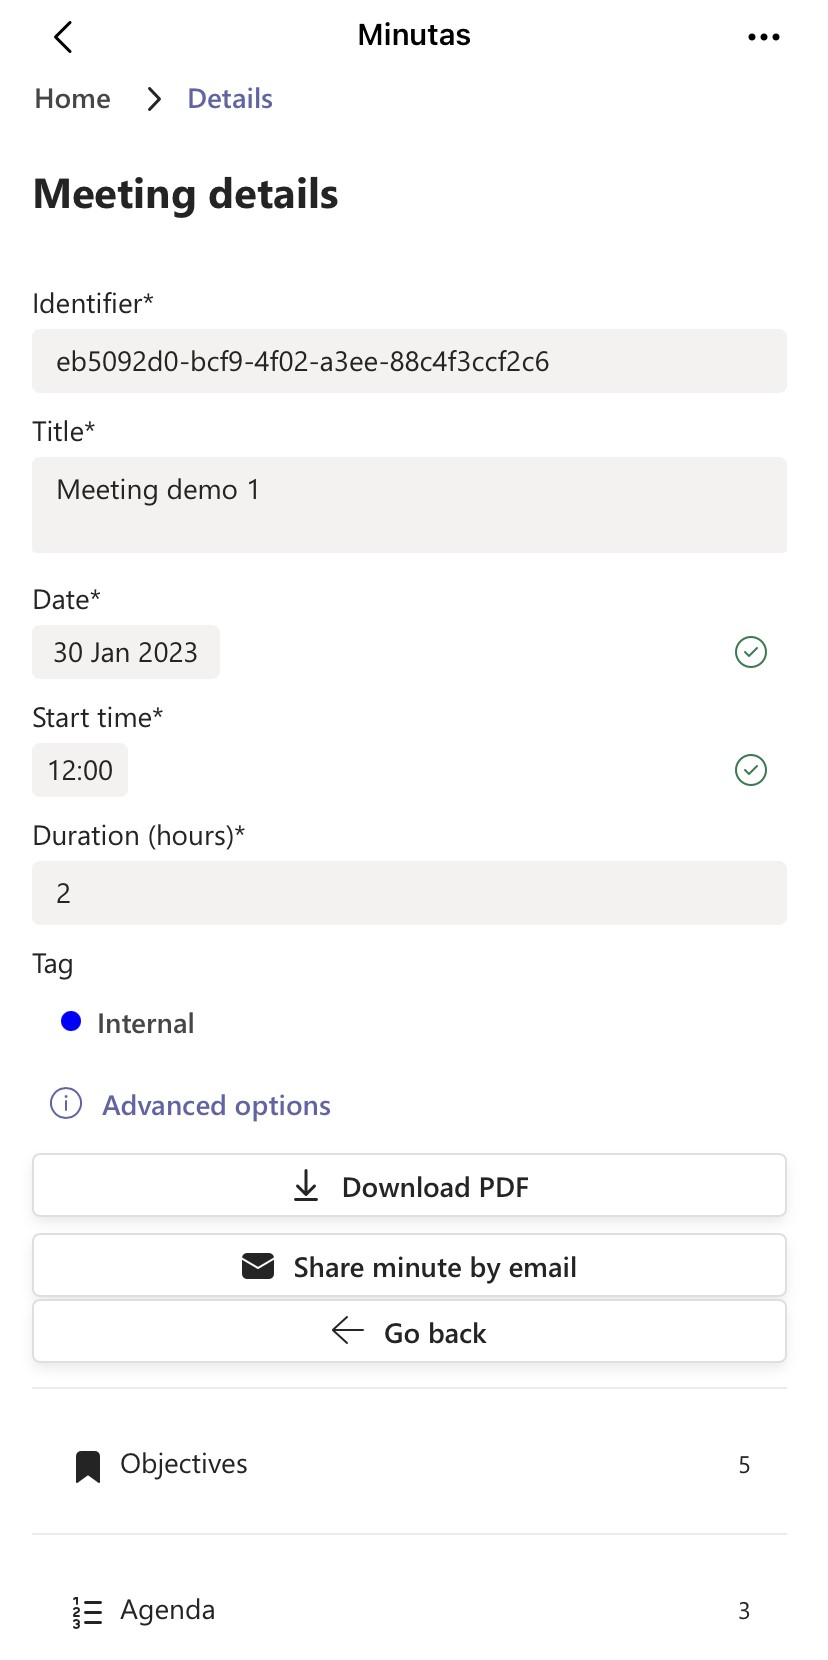
On this section you will capture the meeting details. All changes you make to this form are automatically saved.
The fields contained in the form are described below:
Identifier
By default a unique key is automatically generated, however, you can change this information to assign a folio, key or consecutive number that will serve to identify your meeting.
Title
Free text field to assign a title to your meeting.
Date
Date your meeting will happen.
Time
Start time of your meeting.
Duration
Time reserved for your meeting. It is increased in half hour intervals.
This field allows you to classify your meetings, a tag includes a short description accompanied by a color to easily distinguish the subject, area or classification of the meeting. The tags are unique to each team and you can add as many as you need.
The objectives of the meeting can be captured in the work area. Click the "Add Objective" button to open the edit to the "Description" field where you can write a meeting objective and then click the "Add Objective" button to save the text you have captured. A meeting invitation can have as many objectives as you need.
You can modify any of the objectives you have captured, to do so, click the "Modify" button, to edit the "Description" field again with the objective you need to modify. Make your changes and to save them click the "Save changes" button.
To assign time to each topic that will be discussed at the meeting. In the work area. Click on the "Add Agenda Item" button to open the editing of the "Description", "Start time" and "End time" fields where you can capture the description of the agenda item with its start and end time. destination to discuss the case, then click the "Add Item" button to save the data you have captured. A meeting invitation can have one or more items on its agenda as you like.
To modify an item on the agenda, click on the "Update" button, this will open an edit space for the fields: "Description", "Start time" and "End time" with the data of the item from the agenda that you need to modify. Make your changes and to save them click the "Save changes" button.
You can add a list of attendees to your meeting invitation. Attendees can retrieve them from the list of users in your organization's directory or manually capture their data if they are external to your organization. In the workspace, click the "Add assistant" button to open the edit space.
Add user from my organization:
If you know that the person you are looking for is in your organization's user directory, select the "Users in my organization" option and start typing the name in the "Name(s)" field. The search will be performed automatically and users whose names or surnames begin with the letters you have written will be displayed.
Select the desired users one by one by typing their names and click the "Add attendee" button. When you click the "Add attendee" button, all the selected users will be added in a single step to the list of attendees for the meeting.
If the person you need to add is not registered as a user in your organization's directory, you can still add them by manually entering their name and email. Change the user type selection and choose "External Users" and the screen will display as follows. Capture the person's name and email and click the "Add Attendee" button to add them to the meeting invitation.
To make changes to an attendee's information, click on the "Update" button. This will reopen the editing space in the workspace with the data of the attendee you want to modify. To save your changes, click on the "Save changes" button.
It's important to note that if the person is a user in your organization, you cannot change their email address. However, you can modify their name, which is useful if the person's name is not registered correctly in the directory. In the case of external users, both the name and email address can be modified.
You can document the agreements reached at the meeting. In the tab "Agreements" you can create a list with all those you need to register. Click on the "Add Agreement" button and in the form that will be shown write the content of the agreement reached in the meeting. To save it, click the "Add Agreement" button.
To modify an agreement, click on the button with the icon in shape of a pencil (Update) to display the form with the details of the agreement you want to modify, make your changes, and click on the "Save changes" button to save the changes.
In the "Notes" tab you can create a list of relevant notes from your meeting. Register meeting notes in the "Notes" tab you can create a list of relevant notes from your meeting. Recording meeting notes can help participants remember or clarify issues that have been discussed. Click on the "Add note" button to display the form where you can register the content of your note. Click the "Add Note" button to save the content.
To modify a note, click the "Update" button to display the form with the content of the note you want to modify. To save the changes made, click the "Save changes" button.
Minutas Teams allows you to record the tasks assigned to each attendee during the meeting. To document the assignments, click the "Add Task" button. You will be shown a form where you can enter the task details. Fill in the information and click the "Add" button to save the task.
Title
Required. Task title.
Description
Optional. Long description of the task.
Due date
Optional. Proposed or requested date when the task should be completed.
Priority
Required. Priority level of the task: 1-Urgent, 2-Important, 3-Medium, 4-Low.
Status
Required. Current status of the task: 1-Not started, 2-In progress, 3-Completed.
Assigned to
Required. Name of the person responsible for the task. You can select a user from the organization directory or enter the name and email address if the person is external to the organization. Only one person can be assigned to each task.
Save task to Planner
Optional. Indicates that a copy of the task can be saved in Microsoft Planner if desired, this facilitates task tracking for both you and your team, especially if you are already using this tool to manage your tasks.
You can only send the task to Microsoft Planner if the assigned person is a user already registered in the organization's directory. The task assignee can be a member or a guest of the Team.
Plan
Optional. This field is only enabled and required when the option "Save task to Microsoft Planner" is activated. It allows you to indicate the Microsoft Planner Plan in which the task should be saved.
Bucket
Optional. This field is only enabled and required when the option "Save task to Microsoft Planner" is activated. It allows you to indicate the Microsoft Planner Bucket in which the task should be saved. When you select a plan in the "Plan" field, the Buckets that exist in the selected plan will be loaded into this field.
Once you have created a task, the list will be updated in the "Tasks" tab.
Every time you create a task, an email is sent to the assignee informing them that a task has been assigned to them. If the person is a member or guest of the Teams team, they can review the task at any time. However, if the person is external to your organization, they will not be able to access Teams and will need someone from the team with sufficient permissions to update the task after it has been completed.
Modify a Task That Has Not Previously Been Submitted to Microsoft Planner
If you modify a task that has not previously been submitted to Microsoft Planner, the capture form will be displayed, and you can modify all the fields of the task. You will also be allowed to add the task to Microsoft Planner if desired.
If you created or modified a task and specified that it should be sent to Microsoft Planner, when you click the "Update" button of the task, the following screen will be displayed where you can modify the general details of the task, but you will no longer be able to change the task's location in Microsoft Planner (Plan and Bucket fields).
If Minutas Teams cannot locate the previously sent task in Microsoft Planner, it will display the following message indicating that it could not retrieve the current status of that task.
Modify Task Assigned to a Person Outside Your Organization
When you modify a task assigned to a person who does not belong to your organization, all the fields are displayed, and you can modify them without any restrictions.
In the case that your meeting has pending topics to be discussed or new ones have arisen that should be reviewed in a subsequent meeting, in the "Pending topics" tab you can document them for the record, and they can be taken up again later.
Click on the "Add pending topic" button, a form will open where you can write the description of the pending topic and if you consider it necessary you can set a later date when the topic will be reviewed.
To modify a note, click the "Update" button to display the form with the content of the note you want to modify. To save the changes made, click the "Save changes" button.
In the case that your meeting has pending topics to be discussed or new ones have arisen that should be reviewed in a subsequent meeting, in the "Pending topics" tab you can document them for the record, and they can be taken up again later.
In the case that your meeting has pending topics to be discussed or new ones have arisen that should be reviewed in a subsequent meeting, in the "Pending topics" tab you can document them for the record, and they can be taken up again later.
To modify a note, click the "Update" button to display the form with the content of the note you want to modify. To save the changes made, click the "Save changes" button.
To modify a note, click the "Update" button to display the form with the content of the note you want to modify. To save the changes made, click the "Save changes" button.
To modify a note, click the "Update" button to display the form with the content of the note you want to modify. To save the changes made, click the "Save changes" button.
To modify a note, click the "Update" button to display the form with the content of the note you want to modify. To save the changes made, click the "Save changes" button.
To modify a note, click the "Update" button to display the form with the content of the note you want to modify. To save the changes made, click the "Save changes" button.
On the minute detail screen, the "Advanced Options" button will allow you to view additional minute details:
Creator: Name of the person who created the minute. Is the person with full permissions to manage the content.
Administrator: The minutes can also have a second person with full permissions to modify their content, this person can be designated using this field.
Meeting minute language: The minutes can be used in three languages: English, Spanish, and Portuguese. When created, the default language is determined based on the language configuration in Microsoft Teams.
Protect Minutes: By default, when a minute is created, all the people who are members of the team can make modifications to them. It is possible to protect the content of a minute so only the person who created it or the person designated as "Administrator" of the minute can make changes to it.
Final Version: If you need to avoid making changes to the minute, you can activate the "Final Version" button so that no one can modify or delete the minute.
In the detail screen of each minute, the "Download PDF" button allows you to download the printable version of the same.
Click on the "Download PDF" button to download a file in PDF format with the complete content of the minutes.
If you access Minutas Teams from the internet version of Microsoft Teams through an internet browser, the browser will send you the download like any normal file. Conversely, if you are using the desktop version of Microsoft Teams, the downloaded file can be found in the "Files" section of the Teams main menu.
The "Send minute" button found in the lower left part of the minute detail screen allows you to send the PDF version of the minute to the email of the person requesting it and if you wish you can add additional recipients.
In the "Users in my organization" field you can start typing a person name and Minutas Teams will show you the users in the organization that match your search. You can select one or more users in this field.
If you want to share the minutes with people outside your organization whose e-mail has not been registered in your organization's user directory, you will have to enter the complete e-mail address in the "Additional recipients" field. You can add more than one email, and, in that case, you must separate them by semicolons (;).
The "Add all attendees" button will add to the "Additional recipients" field all the people who are registered as attendees to the meeting.
While you are on the main screen of the application, each minute has a button with the text "Modify". Click on this button to go to the minute detail screen where you can make the changes you need or access additional actions on the minute.
Each minute also has a button with the text "Delete". Click on that button to delete the minute. You will be asked for a confirmation before the minute is actually deleted. Be careful because it is an irreversible action, and the entire content of the minute will be deleted.
In Minutas Teams, a meeting invitation is an invitation to a meeting that hasn't happened yet. You can create as many meeting invitations as you need. Any meeting invitations can later be converted into a minute to take advantage of the information you have already captured.
Create a new meeting invitation
To create a new meeting invitation, on the main screen of the application click the "Create a new meeting" button. The application will then show you a screen where you can capture the relevant data of your invitation:
The application will now display a screen where you can enter the relevant information for your invitation.
In this section the general data of the meeting invitation is captured. All changes you make to this form are automatically saved. The fields contained in the form are described below:
Title
Free text field to assign a title to your meeting.
Date
Date your meeting will happen.
Time
Start time of your meeting.
Duration
Time reserved for your meeting. It is increased in half hour intervals.
The objectives of the meeting can be captured in the work area. Click the "Add Objective" button to open the edit to the "Description" field where you can write a meeting objective and then click the "Add Objective" button to save the text you have captured. A meeting invitation can have as many objectives as you need.
You can modify any of the objectives you have captured, to do so, click the "Modify" button, to edit the "Description" field again with the objective you need to modify. Make your changes and to save them click the "Save changes" button.
To assign time to each topic that will be discussed at the meeting. In the work area. Click on the "Add Agenda Item" button to open the editing of the "Description", "Start time" and "End time" fields where you can capture the description of the agenda item with its start and end time. destination to discuss the case, then click the "Add Item" button to save the data you have captured. A meeting invitation can have one or more items on its agenda as you like.
To modify an item on the agenda, click on the "Update" button, this will open an edit space for the fields: "Description", "Start time" and "End time" with the data of the item from the agenda that you need to modify. Make your changes and to save them click the "Save changes" button.
You can add a list of attendees to your meeting invitation. Attendees can retrieve them from the list of users in your organization's directory or manually capture their data if they are external to your organization. In the workspace, click the "Add assistant" button to open the edit space.
Add user from my organization:
If you know that the person you are looking for is in your organization's user directory, select the "Users in my organization" option and start typing the name in the "Name(s)" field. The search will be performed automatically and users whose names or surnames begin with the letters you have written will be displayed.
Select the desired users one by one by typing their names and click the "Add attendee" button. When you click the "Add attendee" button, all the selected users will be added in a single step to the list of attendees for the meeting.
If the person you need to add is not registered as a user in your organization's directory, you can still add them by manually entering their name and email. Change the user type selection and choose "External Users" and the screen will display as follows. Capture the person's name and email and click the "Add Attendee" button to add them to the meeting invitation.
To make changes to an attendee's information, click on the "Update" button. This will reopen the editing space in the workspace with the data of the attendee you want to modify. To save your changes, click on the "Save changes" button.
It's important to note that if the person is a user in your organization, you cannot change their email address. However, you can modify their name, which is useful if the person's name is not registered correctly in the directory. In the case of external users, both the name and email address can be modified.
The objectives of the meeting can be captured in the work area. Click the "Add Objective" button to open the edit to the "Description" field where you can write a meeting objective and then click the "Add Objective" button to save the text you have captured. A meeting invitation can have as many objectives as you need.
While you are on the main screen of the application, each meeting invitation has a "View event" button. Click on that button to go to the detail screen where you will find the "Schedule meeting" button. Click again to send your meeting invitation. You will be asked for a confirmation to send the meeting invitation by email.
While you are on the main screen of the application, each meeting invitation has a button with the text "View event". Click on that button to go to the detail screen where you can make the changes you need or Schedule the meeting invitation if you have not already done.
While you are on the main screen of the application, each meeting invitation has a button with the text "View meeting". Click on that button to go to the detail screen where you will find the "Delete meeting" button. Click again to delete the meeting invitation. You will be ask for a confirmation before the meeting invitation is actually deleted. Be careful because it is an irreversible action and the entire content of the meeting invitation will be removed.
On the main screen of Minutas Teams, you will find the "Details" button. Clicking on it will open a box with a summary of the subscription usage.
In this device
It indicates the total number of minutes and events that are registered on the device used.
On other devices
It indicates the total number of minutes and events available on all devices configured for the subscription.
Used
Esta opción de filtrado le permite buscar las minutas realizadas hasta una fecha específica.
Available
It indicates the number of minutes and events still available for the subscription. In case the subscription has no limit, the words \"No Limit\" will be displayed.
The subscription will be active until
This line shows the expiration date of the subscription.
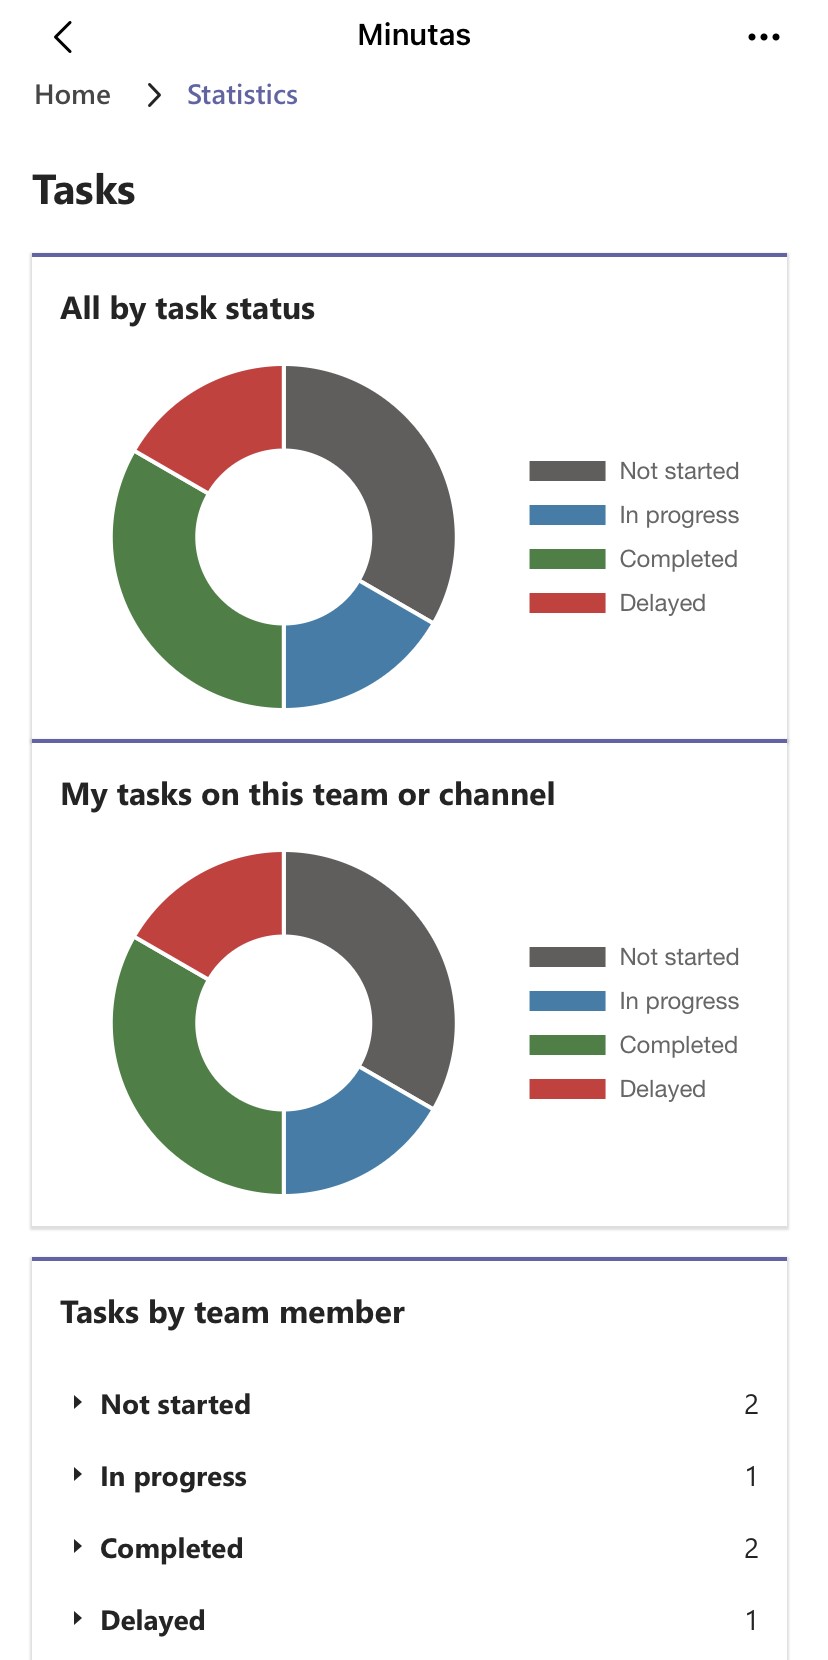
If you are in a team or channel, you will find on the main screen of Minutes Teams the \"Statistics\" button. By clicking on it, you will be redirected to a screen that will provide valuable information about the status of tasks assigned to team members.
All by task status
The screen will provide a summary of the status of all tasks recorded in the minutes created by the team.
My tasks on this team or channel
The screen will show the status of tasks assigned to users within the minutes created in the team.
Tasks by team member
The screen will show individually, for each user, the status of tasks assigned to them in the minutes created by the team.
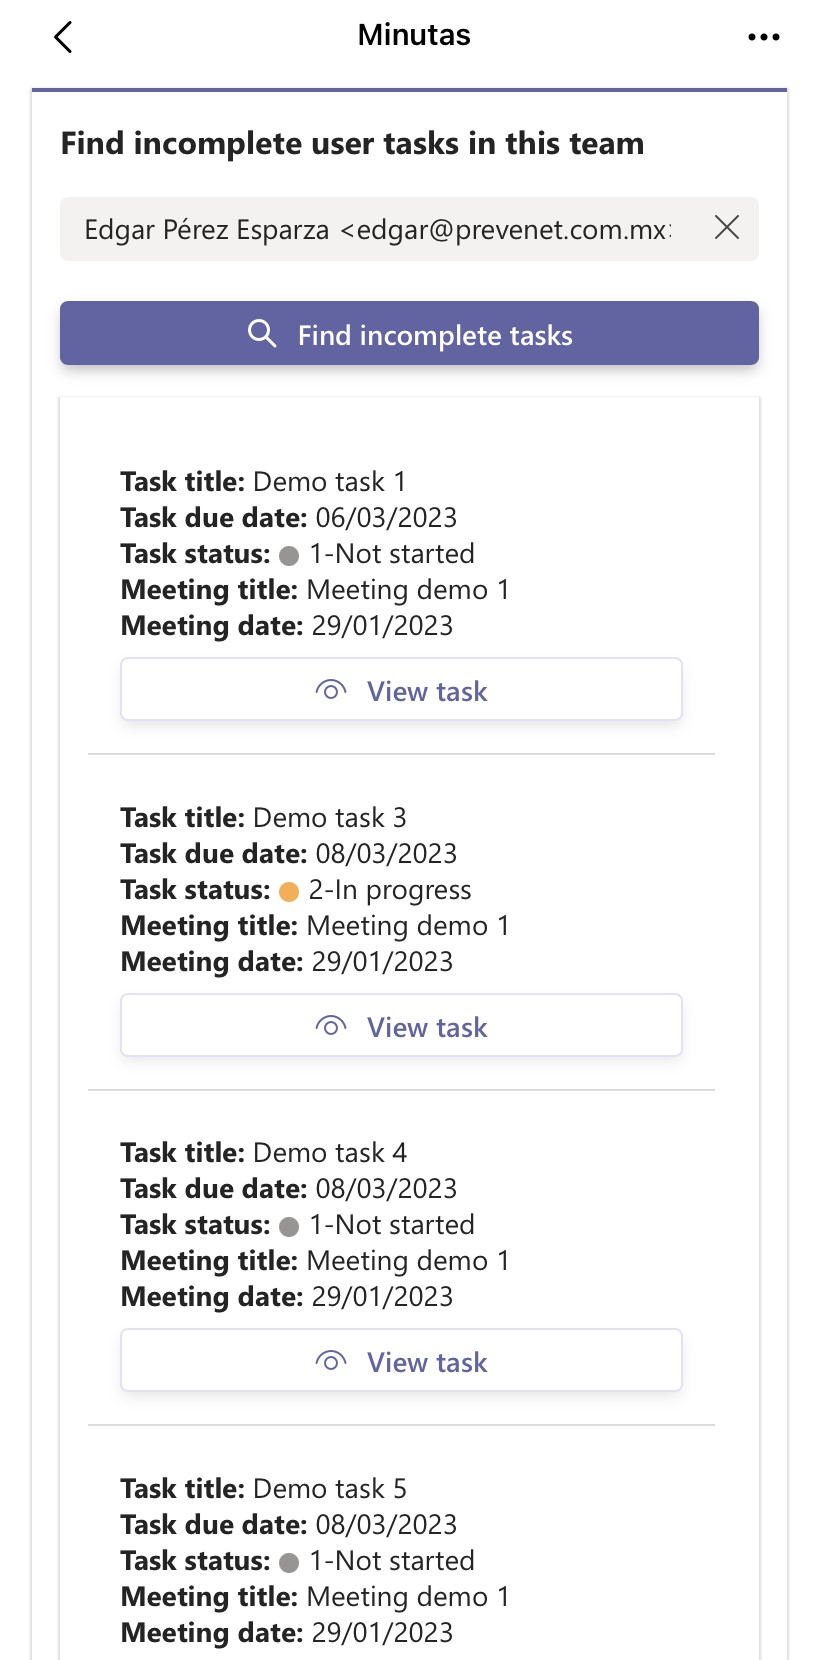
Find incomplete user tasks in this team
In this section, you can search for information about tasks not completed by each user. Users who have all their tasks completed will not appear in this list.
To access information about tasks, you must enter the username you want to search for and click the \"Find incomplete tasks\" button. A list of pending tasks for that user will be displayed.
To get more details about a specific task, simply press the 'View task' button, which will open a dialog box with relevant information, such as the meeting title, task description, and due date.
If you are in the personal tab, you will see the \"My tasks\" button on the main Minutas Teams screen. By clicking on it, you will be redirected to a page that provides valuable information about the status of tasks assigned exclusively to you.
All my tasks
It will present a summary of tasks assigned to your user in all generated minutes, regardless of the team or channel they belong to.
Tasks in my personal tab
It will show a summary of tasks assigned to your user in minutes generated exclusively in the personal tab.
My incomplete tasks from my personal tab and any team
In this section, you can view information about the incomplete tasks assigned to your user, regardless of the team or channel they belong to.
In this section, you can update the tasks assigned to your user, regardless of the team or channel they belong to. To do this, simply click on the \"Update\" button and select the current status of the task. The changes will be reflected in the summaries and statuses of the tasks in the minutes.
On the main screen of Minutas Teams, you will find the "Search" button. Clicking on it will open a dialog box that allows you to filter and search for minutes using the following options:
Keywords
This filtering option can be done considering that the keyword may be at the beginning, in the middle, or at the end of the minute's title.
Since
This filtering option allows you to search for minutes made from a specific date.
Until
This filtering option allows you to search for minutes made until a specific date.
Final versions
This filtering option allows you to perform a search that displays all minutes, regardless of their status, only minutes with a final minute status, or all minutes except the finalized ones.
Type
This filtering option allows you to perform a search that displays all minutes and events, only events, or only minutes.
Tag
This filtering option allows you to search for minutes that have a label assigned by you.
All filtering options are cumulative, which means you can combine different search criteria to enhance the results.
On the main screen of Minutas Teams, you will find the "Manual" button. Clicking on it will open a new tab in your browser, which will redirect you to this site.
To continue using our application after the trial period, you must have an active subscription.
Our subscription plans offer a predetermined amount of meeting minutes that can be shared by all members of your organization. If you require more meeting minutes, you have the option to purchase additional subscription plans. The available meeting minutes will be the sum of all active subscriptions. This way, you can ensure you have enough meeting minutes to meet your team's needs.
To purchase one of our plans, we invite you to visit the following link where you will find all our available purchase options.
You can use Minutas Teams on your mobile devices. The main sections of the application are correctly displayed on smartphones, tablets and personal computers, adjusting to the available space.
Images: Mobil Devices. Click to see the images
Other messages
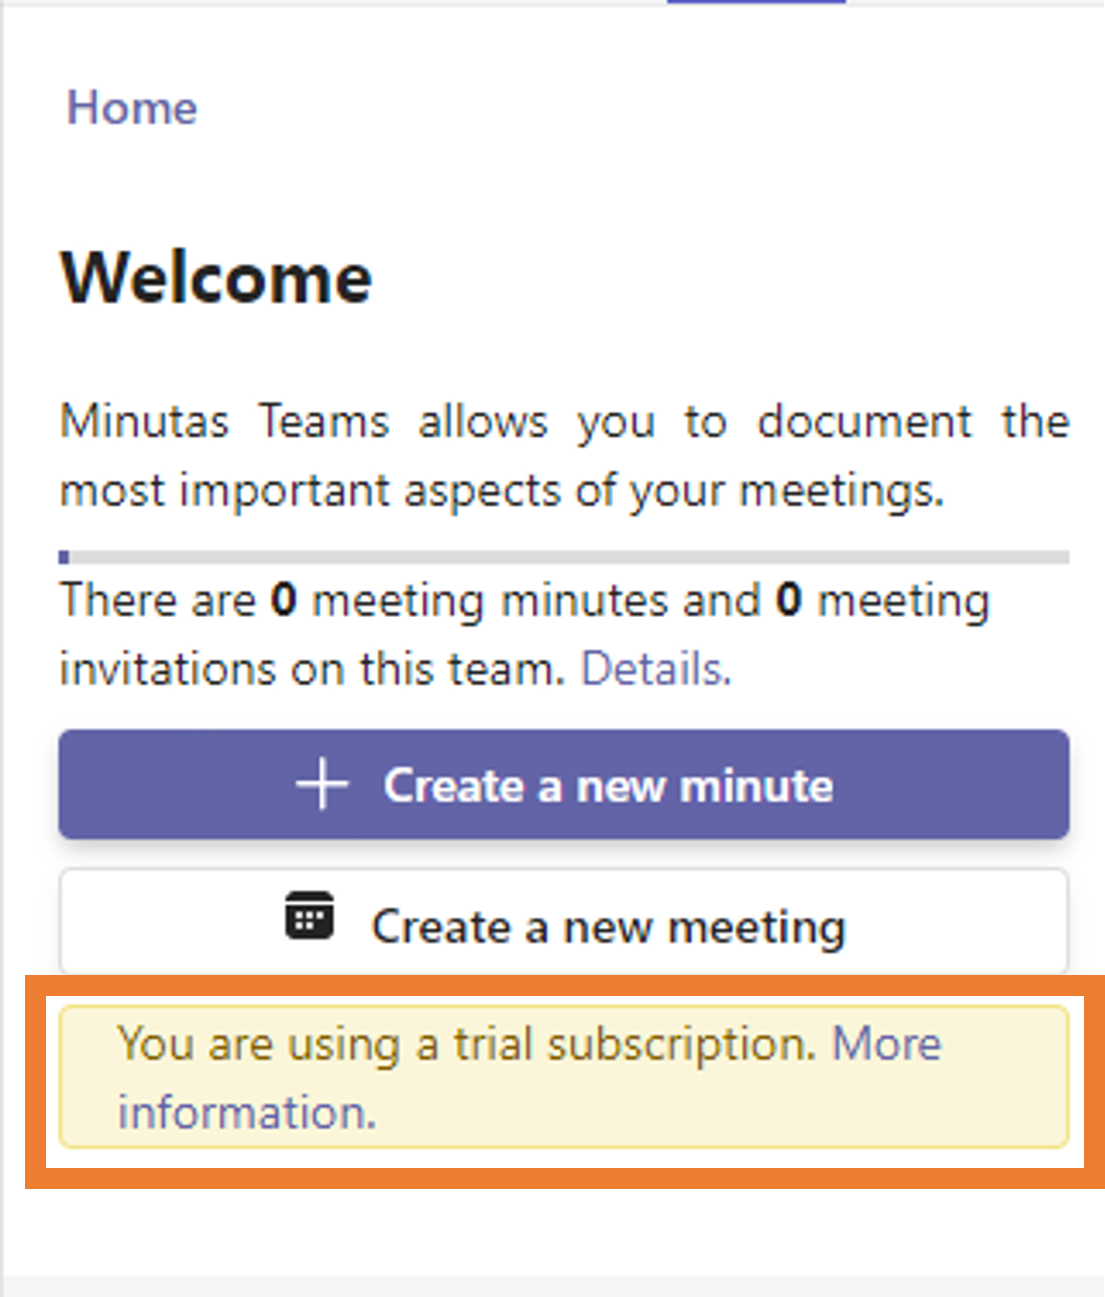
When you or someone from your organization first downloads Minutas Teams, you automatically have a 30-day trial period. Therefore, the following message will appear below the "Create new event" button.
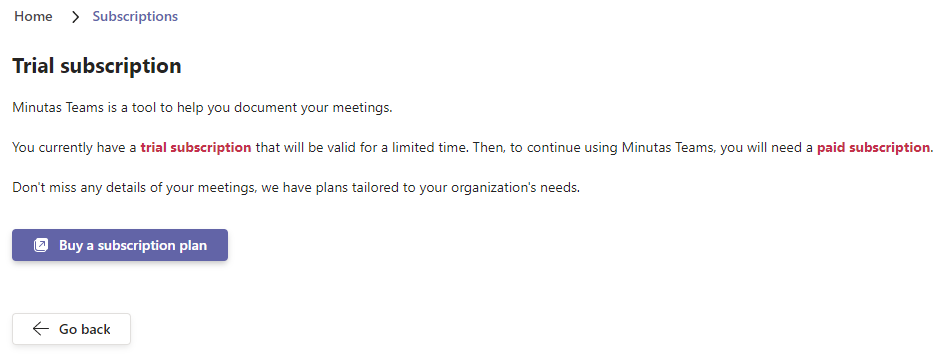
By pressing \"More information\", you will be redirected to a screen where you will be provided with more information about subscription plans. You can purchase a subscription by pressing the "Buy a subscription plan" button.
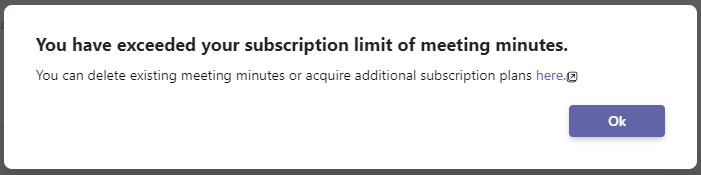
If you have reached the limit of minutes you can create, the following message will appear. You can purchase an additional subscription by pressing the "Buy a subscription plan" button.
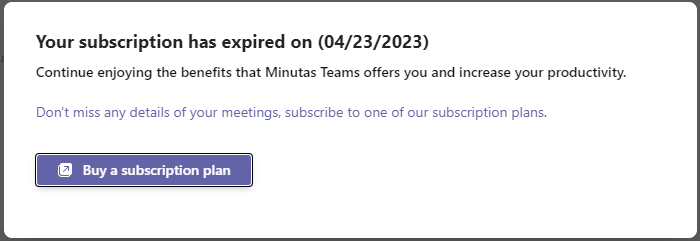
When your trial period or subscription expires, you will see the following message. You will have a 15-day period to back up your generated minutes before access is blocked. However, you will not be able to generate more minutes. You can continue enjoying the benefits by purchasing a subscription, just press the "Buy a subscription plan" button.
After 15 days of your subscription expiration, upon entering Minutas Teams, you will see the following blocking message. However, you can still enjoy the benefits by purchasing a subscription, just press the "Buy a subscription plan" button.
Last updated:2023-08-14
Future updates to the Minutas Teams app may include changes to the app's user interface, navigation, and features.